

Guys so let’s say you get an error like “Chrome OS is missing or damaged” on your Chromebook out of nowhere. This sucks; which means there’s something wrong you can’t boot into your operating system. You can’t get online and you can’t do the things you need to do. So in this article, I’m gonna tell you how to fix this really easily.
Table of Contents
Fix the “Chrome OS is missing or damaged” Error In 6 Steps
Find Model No.
Okay, so the first thing you need to do in this case is close the Chromebook and flip it over. Then you need to look at the back of the laptop to find out what the exact model of your Chromebook is.
Require SD Card Or USD Drive
The other thing that you’re going to need is some sort of USB Drive. You can also use an SD card reader as well. Well, your SD card or your USB Drive only needs to be a few gigabytes. You only need probably 4 or 8 gigs for this to work and again you can use an SD card reader as long as you’ve got an SD card for that as well.
Install Chromebook Recovery Utility
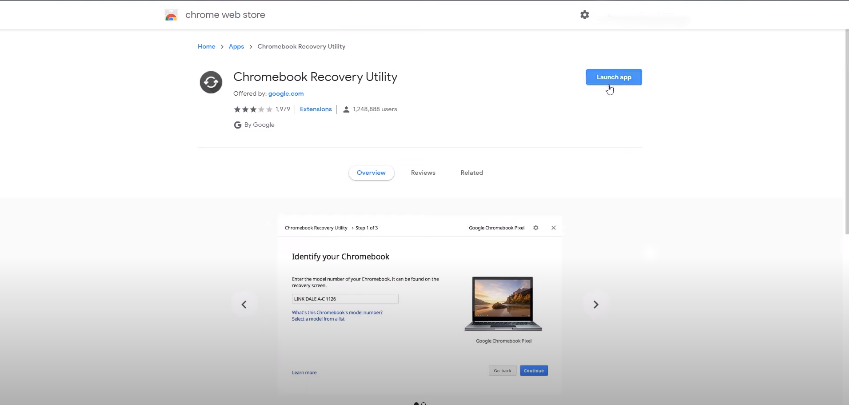
Ok, so the next thing you’ll need to do is plug your USB Drive into your computer. You should also note that doing this will erase everything on your USB Drive. After plugging in your USB Drive you’re going to open Chrome and yes it has to be Chrome in order for the Google Chrome Web Store to work. Once you’ve opened Google Chrome, you’ll search for the Chromebook Recovery Utility. Chances are up there in the top right where it will say launch app if you’ve already installed it but in your case, it will say something to the effect of install app or something similar.
Once you’ve done that You’re going to go ahead and click launch app and that’s gonna pop open this window so here it does say you’ll need four gigabytes or larger. I just wanted to reiterate that two gigabytes will not work. You need four eight or 16 gigabytes of USB Drive to work.
Select Your Brand And Model No.
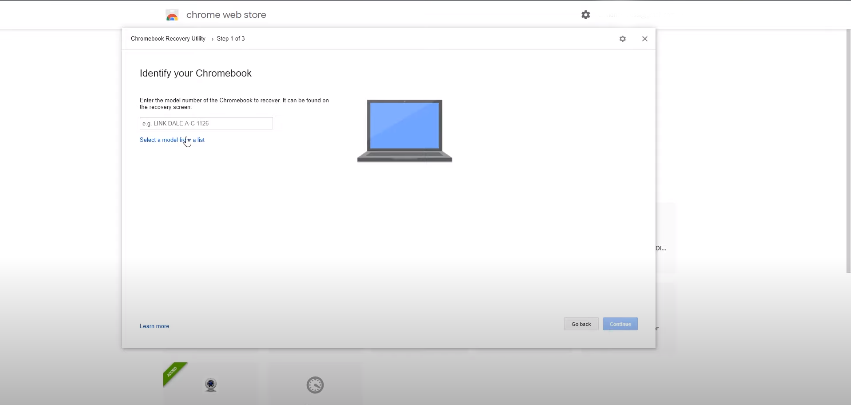
Then click on get started and then you’ll get the option where you can type your Model no. of Chromebook. If it doesn’t work; then what you can do is go ahead and select the model from the list. This way you’ll get an option to choose a brand. Then you can scroll down to choose your brand and Chromebook model.
Once you select your Chromebook click continue; then you’ll select the drive that you want to use. Again remember you can use any USB Drive which should be above 4 gigs. So go ahead and select that and click on continue.
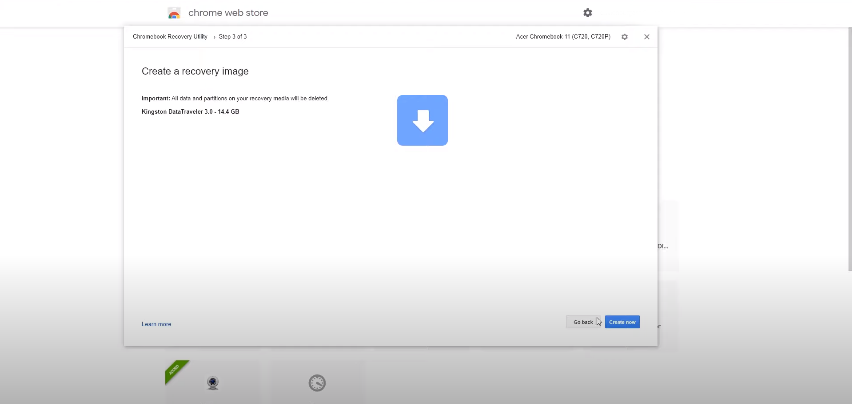
Create Recovery Media Drive
Here’s the final step: make sure that it has everything you want to do if so, then click create now. Okay so once that process is done; it will say you can now safely remove your recovery media. After that go ahead and click on done and then you can remove the USB drive from your computer.
Finish Your Operating System’s Installation Process
We’re gonna go back to our Chromebook. Here you’ll need to open your Chromebook and hold Esc+Refresh on the keyboard to reboot. Then take the USB Drive that you’ve just created and plug that in. It will automatically go into the sequence that will recover your Chromebook. Okay so here you are just a couple of minutes later it will say the system recovery is complete and you can now remove your recovery media and the computer will restart automatically.
Just remove your USB Drive and the screen might say that OS verification is off if you’ve enabled it. If you haven’t enabled OS verification on your Chromebook you probably won’t see it.
By now you’ve probably been back to your desktop and ready to log into your Chromebook.